Drone Transponder Dr & How it Works~
It consists of 5 major components and get powered by small battery:
- ESP8266
- DHT11 Sensor
- GPS BME 880 Cirocomm
- ESP32 Cam
- Digital Gyro
- 3.7v Li-ion Battery
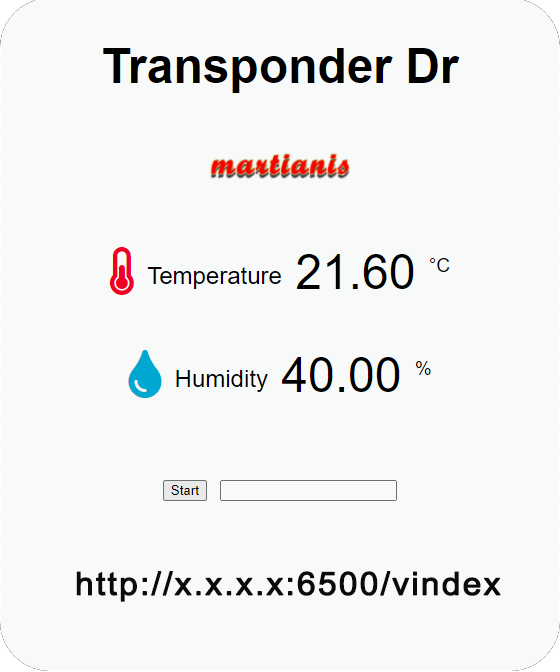
The very first module we will be making is for Temperature & Humidity determining and view it on any device connected to the same network and/or push data to post on cloud server with subscription for flight management purposes. Members of Martianis Flight Club gets many benefits in which one of them is to ask free subscription to post data on cloud. Lets get going step by step how to set up first module, folks may not want to build the black box with all components that we are using onboard but this small chip with single sensor could be helpful in home or office environment to have an eye on temperature or humidity level to help maintain health better.
Step 1 – Make tools ready & system to work!
The are plenty of software programs for coding, in our case we are using Arduino to program this chip! You may download the appropriate version according to the OS that you are running from official website of Arduino https://www.arduino.cc/en/software. Install & run the program, get familiar with menu and toolbars in program and how to choose board for programming.
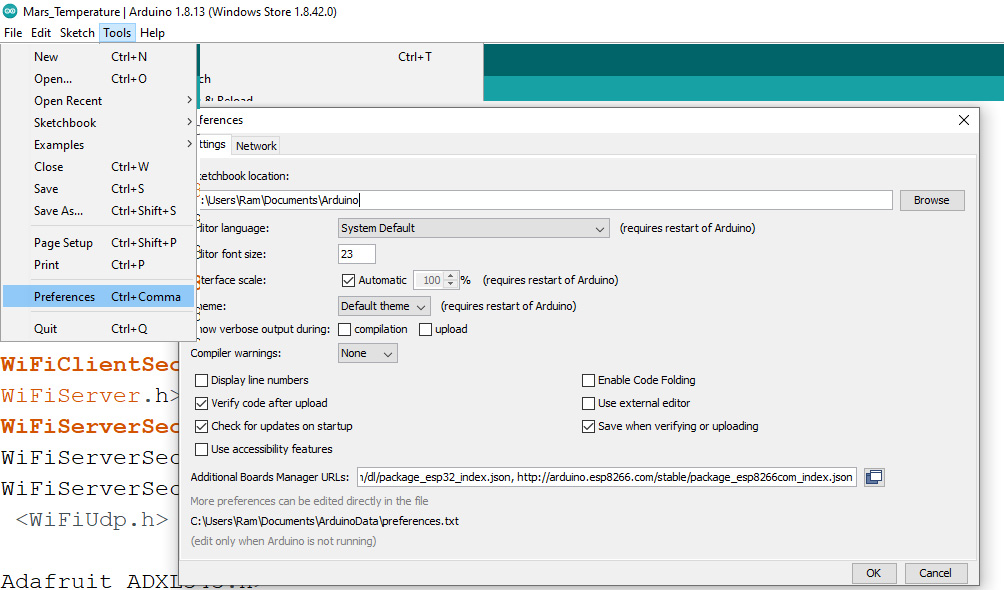
You may have to add these URL’s in Preferences, Additional Board Manager:
http://arduino.esp8266.com/stable/package_esp8266com_index.json, https://dl.espressif.com/dl/package_esp32_index.json
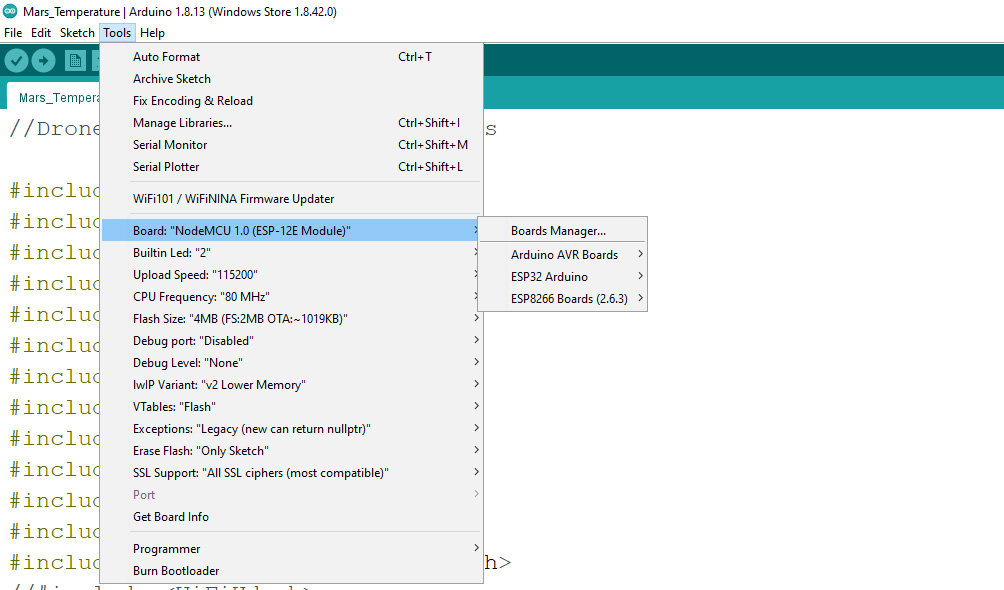
Once preferences updated, select board Node MCU 1.0 that is latest version. Now connect the usb with esp board with Pc and now system is ready to program chip~
Step 2 – Understand System & Upload Libraries
Like traditional server when we initially set up operating system most probably Linux; we need to install individual applications according to output requirement, we required individual service library on ESP controller. Following are the services and applications required to run~ From tool menu choose manage libraries and install one by one.
- Web server that can host web page
- TCP Manager for session communications
- Wifi Client Server
- DHT11 Sensor
You may not find first 2 Libraries that you can download from Github, extract it and copy it Arduino Libraries.
luckyconnections9/ESP8266_DHT_mode at master (github.com)
Step 3 – Upload the program on ESP8266
Once you have updated all libraries, download the program from Github page and paste to arduino update Wifi information before you upload. You may verify the code before uploading on esp chip.
All done, open serial monitor and press Reset button on device! You can read the IP address that it have received from router! You can browse that IP within same network and you should be able to see Results live~